How to Install the portable AC Unit
Note: Install this portable AC unit in the front entry room to the left of the TV. Please see images below.
Step 1: Go to the laundry room. Roll the AC unit out and retrieve the exhaust hose and window panels from the plastic bag on top of the shelf.
Note: This plastic bag has everything you need to complete the installation including foam scraps and screws. You can find the screw driver in the black tool box on the middle shelf.
Step 2: Attach one end of the exhaust hose to the back of the AC unit — slide the hose into the slot and press firmly to lock into place.
Note: The hose is accordion-like, so pull it apart to extend it a bit and give yourself room to work with.
Step 3: Open the window fully. Fit the adjustable window panels into the opening and extend it to fill the width of the window. It should sit snugly with no large gaps around it.
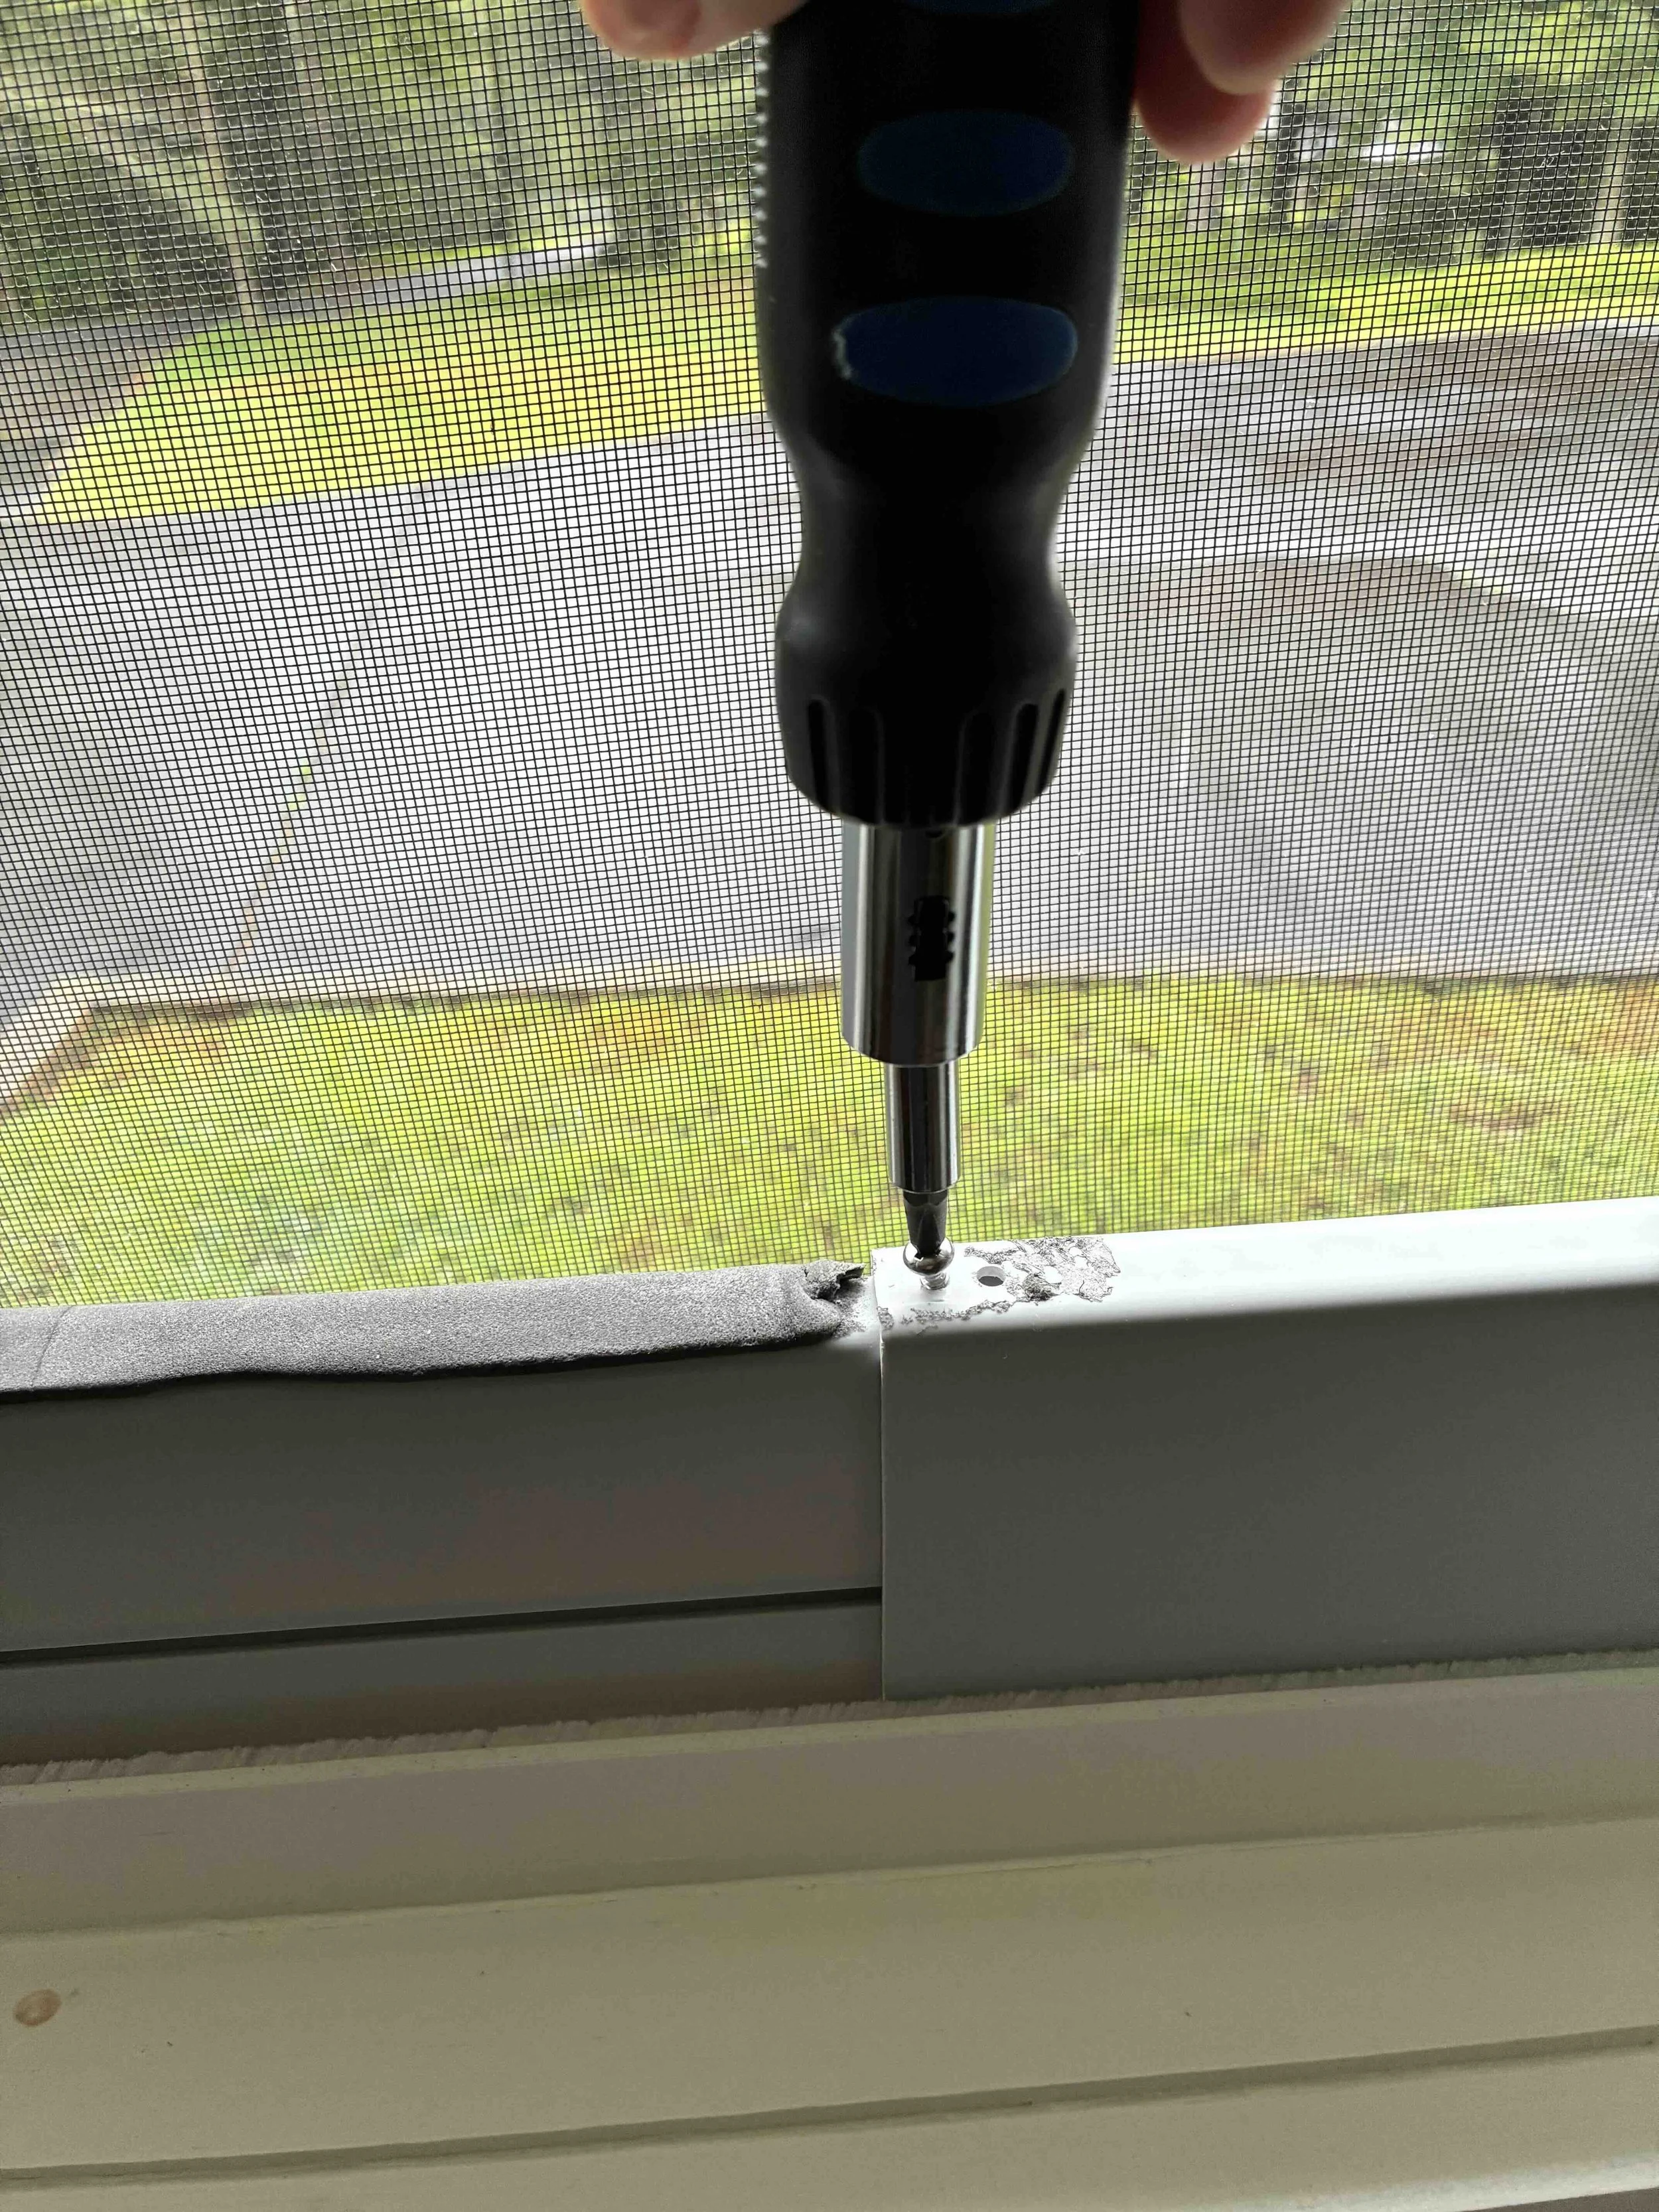
Note: Make sure the right side of the panel is flushed against the window and use the foam scraps to fill the gap on the left side of the window. Screw a screw into the hole on the top face of the panel to securely connect the two panels together.
Step 4: Attach the other end of the exhaust hose to the circular connector on the window panel — press firmly to lock into place.
Step 5: Close the window down onto the panels tightly so it is sandwiched securely between the window sash and the sill.
Tip: Please open the 2 window latches (located in the middle of the window, left and right) to “lock” the window, while allowing it to remain open slightly for the panels.
Step 6: Plug the unit directly into the outlet by the window. Do not plug the AC unit to an extension cord.
Step 7: Turn the unit on, set to Cool, and confirm cold air is coming out and the hose feels warm, meaning hot air is venting outside properly.
Note: Please save the bag for storage later.
Step 8: Finally, adjust and extend the hose if necessary, and position the AC unit past the TV stand so it is not too close to the window.